How To Install A Premier Insulated Chimney Damper Instructions
July 19, 2023
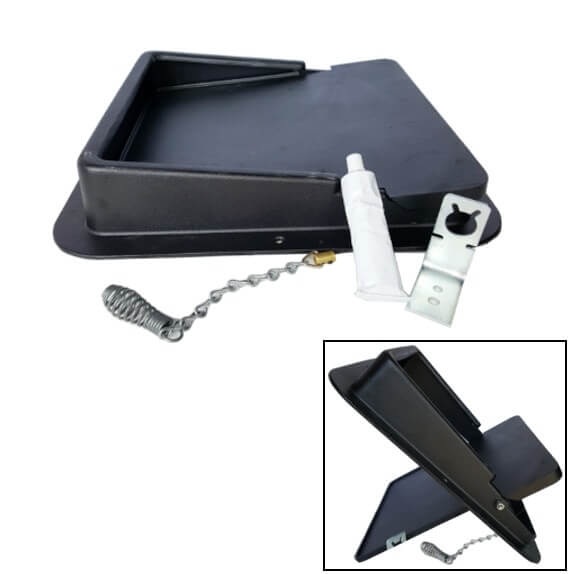
Parts List:
A. Premier Insulated Chimney Damper
B. Firebox Bracket
C. 50 ft. of Stainless Steel Cable
D. (2) Tapcon and Washer
E. Handle/Chain Assembly
F. Allen Wrench
G. Silicone
H. Installation and Warranty

Attach the eyelet end of the cable to the stainless steel ring on the damper lid cable assembly.

To achieve a total seal, first run a thick bead of silicone around the flue liner top.

Take the zip ties off cable and drop down the flue.

Tighten the screws on the cap-damper just like on a chimney cap.

The slot in the firebox bracket should always be towards the rear. If placed on the left hand side of the firebox have the tail up, for the right hand side, tail down.

Position the firebox bracket about two feet above the firebox floor. Position in a convenient place to use. Drill the top hole using a 3/16" masonry bit.

Hammer the tapcon and washer into the hole. Drill the lower hole and hammer in the second tapcon.

Thread the ball-chain assembly through the keyhole slot in the firebox bracket and let it hang.

Fish the stainless steel cable from the smoke chamber and determine how much cable to cut off, leaving a few extra inches for future adjustments.

Place in the cable lock at this point and tighten the set screw with the allen wrench. Make all adjustments to the system before you cut the cable.

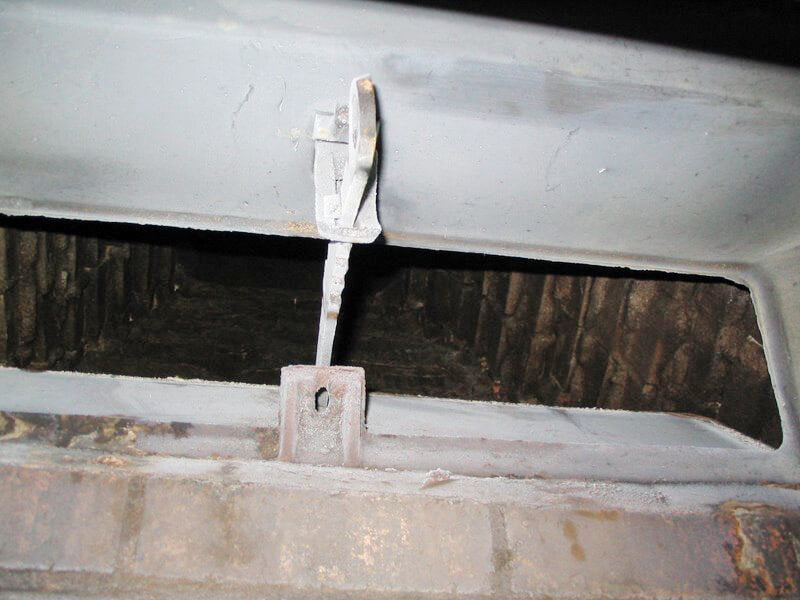
Completed assembly should look like this image!
Servicing your chimney damper:
Release the bottom cable in the firebox. Remove damper lid and detach tension springs under lid.
Remove center locator by pushing it down.
Angle damper and pull through frame, the flue is now ready for brushing!
Related Articles
DIY Center
(AKA ‘The Rockford Files’)
From video tutorials to product walkthroughs, we have a variety of DIY resources just for you! Click the button below to view our entire library.
Our 316Ti flexible chimney liner and chimney liner components have passed the rigorous testing at the Underwriters Laboratories with best in class status and are UL Listed. So if you are looking for UL listed chimney liner sold directly to homeowners, then look no further than Rockford Chimney